

/https%3A%2F%2Fassets.over-blog.com%2Ft%2Ftwentyeleven%2Fimages%2Fpine-cone.jpg "Latest Tech News, Mac News, Android Devices, Popular Smart Phones, Camera and Camcorders and Useful Tips and Guides")
How to Transfer Music From iPod to iTunes
Published on January 12 2016

Even though Apple has made it as easy as legally possible to sync your iPod to your computer via iTunes, there comes a time – say when you format your hard drive or get a brand new machine – when your old iTunes library is no longer available and you are forced to wipe all your precious data from the iPod in order to sync it again.
Naturally, you would want to transfer the data from the music player back to your PC or Mac before erasing everything.
Note: If you used to sync your iPod to a Mac, you can only recover its contents on another Mac. There are no platforms restrictions for iPods that were synced to a Windows PC.
Another note: If your iPod is an iPod Touch (any generation), please refer to the guide on how to recover music from your iPhone or iPad found here.
How to Transfer Music From Your iPod to iTunes On a Windows PC
You will need:
- An iPod (any kind and generation except for iPod Touch)
- A Windows PC with the latest iTunes installed
Let’s begin:
1. Make sure that the iPod is not connected to the PC.

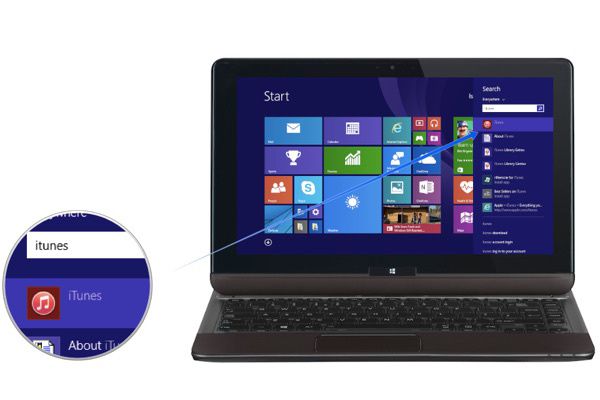
2. Open iTunes.

3. Click the menu icon in the top left corner of the window and from the dropdown menu choose Preferences.

4. Switch to the Devices tab.

5. Check the box saying “Prevent iPods, iPhones and iPads from syncing automatically”.

6. Switch to the Advanced tab.

7. Check the option “Keep iTunes Media folder organized” and press the OK button.

8. Connect your iPod to the PC using the Apple 30-pin data cable, or if you have a newer iPod, using the Apple Lightning cable.

9. Click on the iPod icon in iTunes.

10. Check the box saying “Enable Disk Use”.

11. Click OK to dismiss the warning.
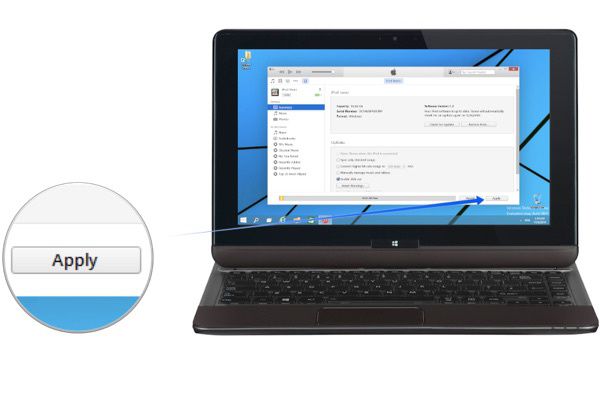
12. Click the Apply button.

13. Close iTunes and open My Computer.

14. If you’re using Windows 8 or 10, click the View ribbon and then press the Options button. If you’re using Windows 7 or Vista, click the Organize button followed by Folder and Search Options. If you’re using Windows XP or earlier, click the Tools menu followed by Folder Options.

15. Switch to the View tab.

16. Locate the “Hidden Files and Folders” section and enable “Show hidden files, folders and drives”.

17. Press OK to close the window.

18. Double-click on your iPod in My Computer.

19. Open the iPod_Control > Music folder.
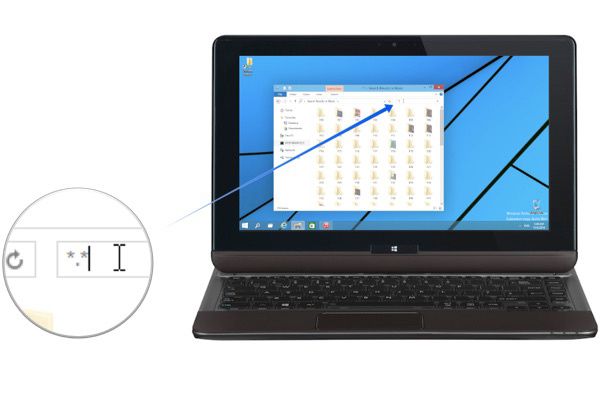
20. In the search field, type *.*
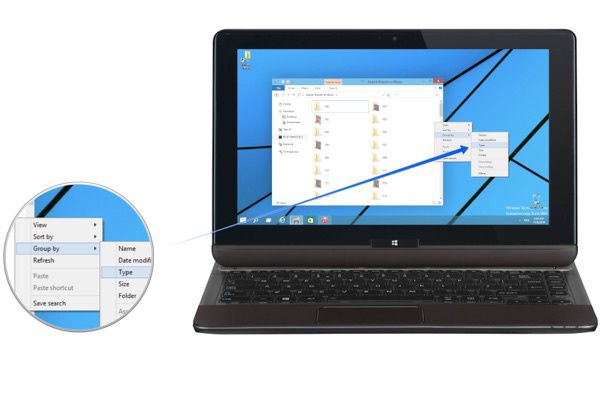
21. Right-click in a white space between the search results and choose Group By > Type. If your Windows versions doesn’t support grouping, use Sort By instead.
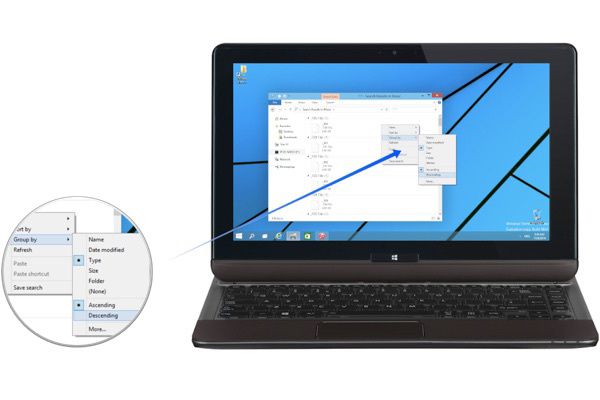
22. Right-click once again in a white space between the search results and choose Group By > Descending.

23. All of your music should now surface to the top of the search results. Select just the music files (and music videos if you have such), right click on one of the selected items and choose Copy.

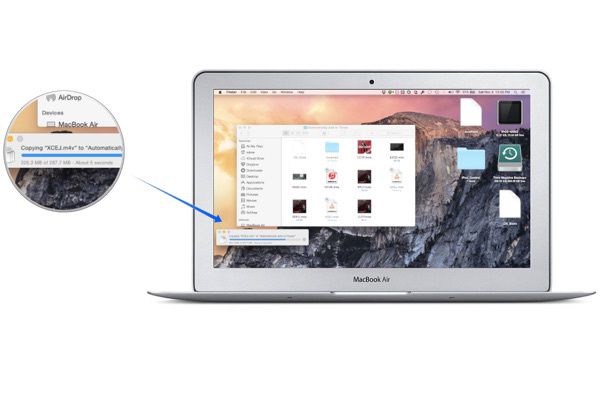
24. Navigate to Music > iTunes > iTunes Media > Automatically Add to iTunes.

25. Right-click in the folder and choose Paste. Wait for the copying process to complete. You will notice how the newly copied files disappear from the folder, that’s normal.
26. Close the Automatically Add to iTunes folder open iTunes.

27. You should be greeted by your music collection! Now we’ll just do a little housecleaning. Click on the iPod icon.

28. Now uncheck the “Enable disk use” option and click Apply. If this is the PC you’ll be using to sync your iPod, you may also sync you media.

29. Click the menu icon in the top left corner of the window and from the dropdown menu choose Preferences.

30. Navigate to the Devices tab and uncheck the “Prevent iPods, iPhones and iPads from syncing automatically” and press OK.

31. Close or minimize iTunes and open My Computer.

32. If you’re using Windows 8 or 10, click the View ribbon and then press the Options button. If you’re using Windows 7 or Vista, click the Organize button followed by Folder and Search Options. If you’re using Windows XP or earlier, click the Tools menu followed by Folder Options.

33. Switch to the View tab.

34. Locate the “Hidden Files and Folders” section and enable “Show hidden files, folders and drives”. Press OK to close the window.
All done!
How to Transfer Music From Your iPod to iTunes On a Mac
You will need:
- An iPod (any kind and generation except for iPod Touch)
- A Mac with the latest iTunes installed
Let’s begin:
1. Make sure that the iPod is not connected to the Mac.

2. Open iTunes.

3. From the menubar, choose iTunes followed by Preferences.
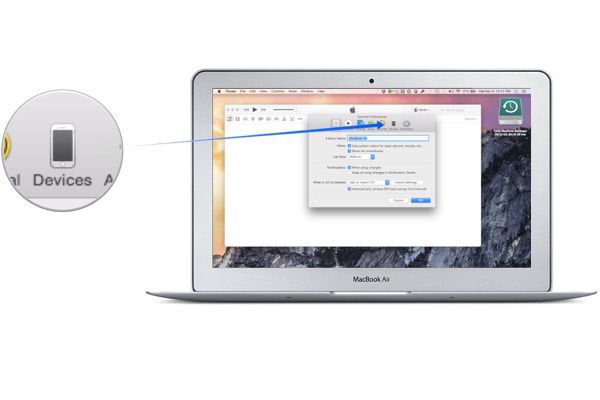
4. Switch to the Devices tab.

5. Check the box saying “Prevent iPods, iPhones and iPads from syncing automatically”.

6. Switch to the Advanced tab.

7. Check the option “Keep iTunes Media folder organized” and press the OK button.

8. Connect your iPod to the Mac using the Apple 30-pin data cable, or if you have a newer iPod, using the Apple Lightning cable. Click on the new iPod icon in iTunes.

9. Check the box saying “Enable Disk Use”.

10. Click OK to dismiss the warning.

11. Click the Apply button.
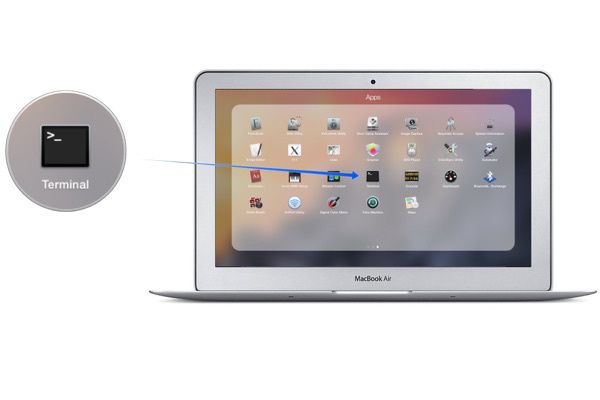
12. Quit iTunes and open Terminal.

13. Enter the following text without quotes and press Enter: “defaults write com.apple.finder AppleShowAllFiles TRUE”

14. Enter the following text without quotes and press Enter: “killall Finder”

15. You should now see a few extra files here and there. Those are hidden files that we’ve just revealed. Minimize terminal and open a Finder window.

16. Find the iPod in the sidebar and click on it.

17. Drag the iPod_Control folder to your desktop, wait for the copy process to complete and close the Finder window.
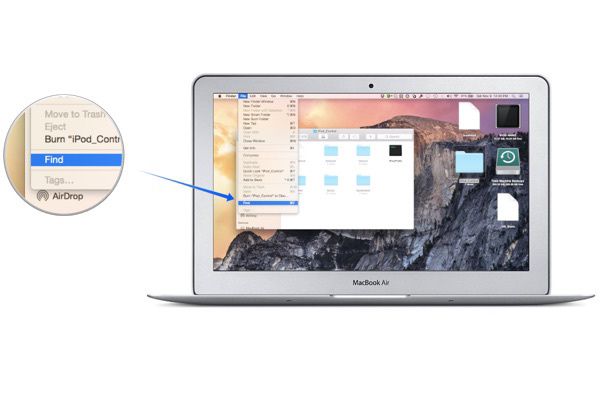
18. Open the newly copied iPod_Control folder. From the menubar, choose File > Find.

19. Enable “iPod_Control” in the Search scope.

20. Click on “Any” which is next to “Kind” and choose “Document”.

21. From the menubar choose View > Arrange By > Size.

22. Click on the “Show All” option in the title field of the first group of search results.

23. At this point, all of your music and music videos should be on the top of the search results. Select all of them and from the menubar choose Edit > Copy.

24. From the menubar, choose Go > Home and then navigate to Music > iTunes > iTunes Media > Automatically Add to iTunes.
25. From the menubar choose Edit > Paste.

26. Wait for the copy process to complete. You will notice that the newly copied media disappears from the folder – that’s normal. When the copy process is complete, close the Finder window and open iTunes.

27. Congratulations, your music is back in iTunes! Now we’ll just do a bit of housecleaning. Click on the iPod icon.
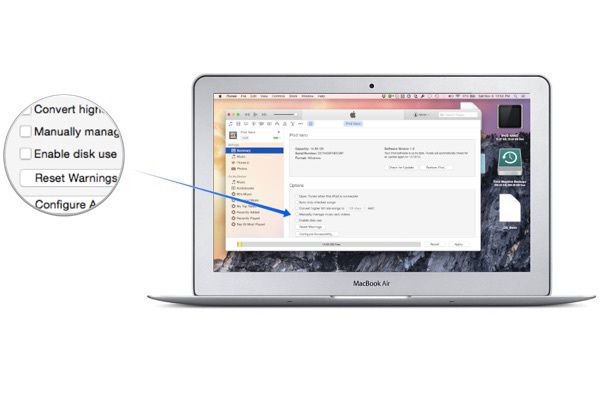
28. Uncheck “Enable Disk Use” and click Apply. At this point, you can also sync your music to the iPod like you normally would.

29. From the menubar choose iTunes > Preferences.

30. Switch to the Devices tab, uncheck the “Prevent iPods, iPhones and iPads automatically” and press OK.

31. Minimize or close iTunes and restore the Terminal window. Enter the following text without quotes and press Enter: “defaults write com.apple.finder AppleShowAllFiles FALSE”

32. Enter the following text without quotes and press Enter: “killall Finder”

33. From the menubar choose Terminal > Quit.
All done!
Article Source: How to Transfer Music From iPod to iTunes