/https%3A%2F%2Fassets.over-blog.com%2Ft%2Ftwentyeleven%2Fimages%2Fpine-cone.jpg "Latest Tech News, Mac News, Android Devices, Popular Smart Phones, Camera and Camcorders and Useful Tips and Guides")
How to permanently delete files on iPhone/iPad/iPod
Published on December 11 2013
Apple devices are always popular. Nearly every year, Apple will release a new iPhone and iPad. Many people would like to get a new iPhone or iPad. Perhaps, now, a large amount of people may have more than two Apple devices. Then, how to deal with the old one?
Give it to your friends or relatives? Exchange it for othe devices? Or just sold it? Of course, you can deal with your Apple devices freely. But one problem that almost all people may consider is how to permanently deleted all the files on your iPhone/iPad/iPod. Many people know that even you manually deleted files from your devicPhonee, others can still recover them back using third-party data recovery program.
Then, the most workable way is to find a powerful data deleting tool to permanmently deleted files from iPhone/iPad/iPod. Lucily, you can get Wondershare SafeEraser which can fast and best wipe out all your personal information likes photos, videos, musics, contacts, messages etc from iDevices iPhone/iPad/iPod etc.
Step by step to permanently delete files from iPhone/iPad/iPod
Step 1: Connect your iPhone/iPad/iPod to the computer
After downloading, installing and running SafeEraser on your computer. Connect your iPhone/iPad/iPod to the comptuer, and then, you will see the following interface:
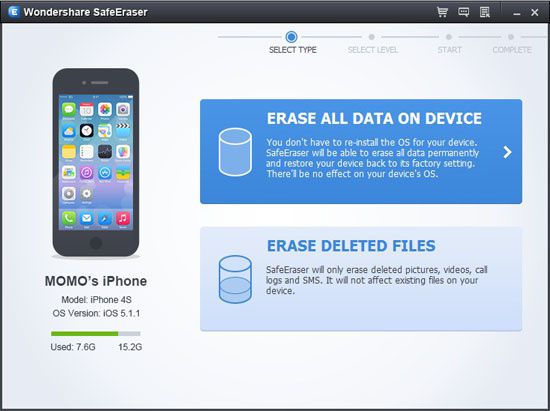
Step 2: Choose a type for data erasing
You can see the basic information about your device on the left. On the right, there are two types offered for you to wipe out data
Wiper Overall: Erase all data and settings permanently
Wipe Deleted Files: Only erase deleted videos, photos, call logs and messages etc, making them unrecoverable.
Note: Currently, only the first type is available. Please select the first one. The second one will be available soon.
Step 3: Erase all files on your iPhone/iPad/iPod
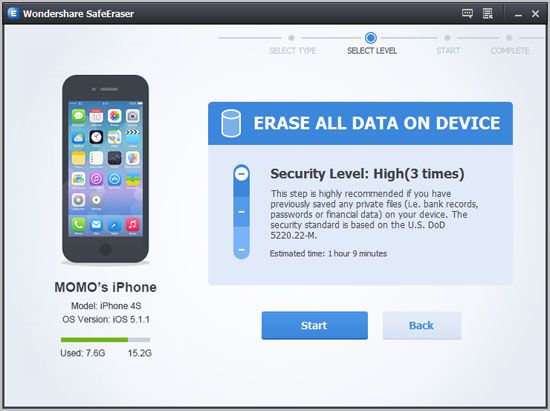
There are three security levels for you to erase all data on your device.
Low: Overwrite all of your data with zeros to ensure that the files are not recoverable.
Medium: Overwrite your device with junk files to ensure that the files are not recoverable, and no one knows that you’ve erased your device. .
High: Erase and overwrite your device three times, and the security standard is based on the U.S. DOD 5220.22-M, more secure for confidential data destruction on your device.
According to your needs, you can select the the right one. Higher levels will take more time. Here, let’s take medium one as an example.
Click the “Start” button. To confirm that you’ve backed up your important data and still want to move forward, you need to type a word shown you in the input box and click “Confirm”. Now, SafeErase start to erase all data on your device as follows:
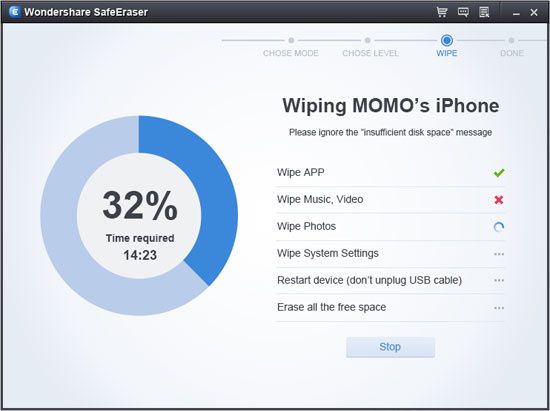
Tips: Be sure to keep your device connected all the time during the process. Otherwise, your data will not be erased completely.
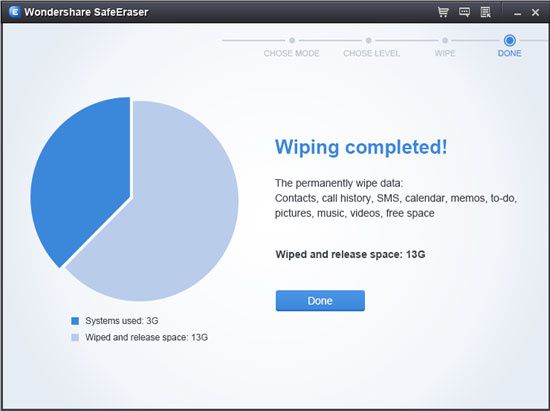
Step 4: Use your device as a new one
After your device is erased permanmently, you’ll get a brand new device. You can either set it as a new device or select to restore it from iTunes/iClound backup.